We are still working on the documentation for Strawberry Shake so help us by finding typos, missing things or write some additional docs with us.
In this tutorial we will walk you through the basics of adding a Strawberry Shake GraphQL client to a Blazor for WebAssembly project. For this example we will create a Blazor for WebAssembly application and fetch some simple data from our demo backend.
Strawberry Shake is not limited to Blazor and can be used with any .NET standard compliant library.
In this tutorial, we will teach you:
- How to add the Strawberry Shake CLI tools.
- How to generate source code from .graphql files, that contain operations.
- How to use the generated client in a classical or reactive way.
Step 1: Add the Strawberry Shake CLI tools
The Strawberry Shake tool will help you to setup your project to create a GraphQL client.
Open your preferred terminal and select a directory where you want to add the code of this tutorial.
- Create a dotnet tool-manifest.
dotnet new tool-manifest
- Install the Strawberry Shake tools.
dotnet tool install StrawberryShake.Tools --local
Step 2: Create a Blazor WebAssembly project
Next, we will create our Blazor project so that we have a little playground.
- First, a new solution called
Demo.sln.
dotnet new sln -n Demo
- Create a new Blazor for WebAssembly application.
dotnet new wasm -n Demo
- Add the project to the solution
Demo.sln.
dotnet sln add ./Demo
Step 3: Install the required packages
Strawberry Shake supports multiple GraphQL transport protocols. In this example we will use the standard GraphQL over HTTP protocol to interact with our GraphQL server.
- Add the
StrawberryShake.Transport.Httppackage to your project.
dotnet add Demo package StrawberryShake.Transport.Http
- Add the
StrawberryShake.CodeGeneration.CSharp.Analyzerspackage to your project in order to add our code generation.
dotnet add Demo package StrawberryShake.CodeGeneration.CSharp.Analyzers
When using the HTTP protocol we also need the HttpClientFactory and the Microsoft dependency injection.
- Add the
Microsoft.Extensions.DependencyInjectionpackage to your project in order to add our code generation.
dotnet add Demo package Microsoft.Extensions.DependencyInjection
- Add the
Microsoft.Extensions.Httppackage to your project in order to add our code generation.
dotnet add Demo package Microsoft.Extensions.Http
Step 4: Add a GraphQL client to your project using the CLI tools
To add a client to your project, you need to run the dotnet graphql init {{ServerUrl}} -n {{ClientName}}.
In this tutorial we will use our GraphQL workshop to create a list of sessions that we will add to our Blazor application.
If you want to have a look at our GraphQL workshop head over here.
- Add the conference client to your Blazor application.
dotnet graphql init https://workshop.chillicream.cloud/graphql/ -n ConferenceClient -p ./Demo
- Customize the namespace of the generated client to be
Demo.GraphQL. For this head over to the.graphqlrc.jsonand insert a namespace property to theStrawberryShakesection.
{ "schema": "schema.graphql", "documents": "**/*.graphql", "extensions": { "strawberryShake": { "name": "ConferenceClient", "namespace": "Demo.GraphQL", "url": "https://workshop.chillicream.cloud/graphql/", "dependencyInjection": true } }}
Now that everything is in place let us write our first query to ask for a list of session titles of the conference API.
- Choose your favorite IDE and the solution. If your are using VSCode do the following:
code ./Demo
- Create new query document
GetSessions.graphqlwith the following content:
query GetSessions { sessions(order: { title: ASC }) { nodes { title } }}
- Compile your project.
dotnet build
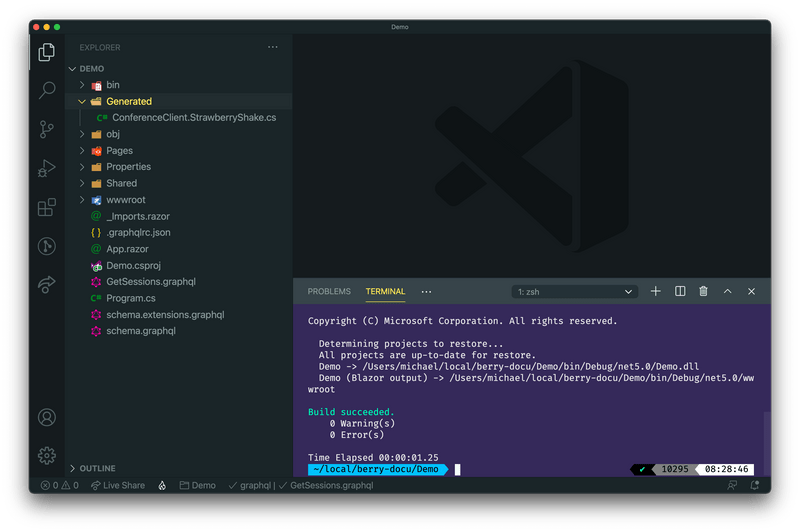
With the project compiled you now should see a directory Generated. The generated code is just there for the IDE, the actual code was injected directly into roslyn through source generators.
- Head over to the
Program.csand add the newConferenceClientto the dependency injection.
In some IDEs it is still necessary to reload the project after the code was generated to update the IntelliSense. So, if you have any issues in the next step with IntelliSense just reload the project and everything should be fine.
public class Program{    public static async Task Main(string[] args)    {        var builder = WebAssemblyHostBuilder.CreateDefault(args);        builder.RootComponents.Add<App>("#app");
        builder.Services.AddScoped(sp => new HttpClient { BaseAddress = new Uri(builder.HostEnvironment.BaseAddress) });
        builder.Services            .AddConferenceClient()            .ConfigureHttpClient(client => client.BaseAddress = new Uri("https://workshop.chillicream.cloud/graphql"));
        await builder.Build().RunAsync();    }}
- Go to
_Imports.razorand addDemo.GraphQLto the common imports
@using System.Net.Http@using System.Net.Http.Json@using Microsoft.AspNetCore.Components.Forms@using Microsoft.AspNetCore.Components.Routing@using Microsoft.AspNetCore.Components.Web@using Microsoft.AspNetCore.Components.Web.Virtualization@using Microsoft.AspNetCore.Components.WebAssembly.Http@using Microsoft.JSInterop@using Demo@using Demo.Shared@using Demo.GraphQL@using StrawberryShake
Step 5: Use the ConferenceClient to perform a simple fetch
In this section we will perform a simple fetch with our ConferenceClient. We will not yet look at state or other things that come with our client but just perform a simple fetch.
Head over to
Pages/Index.razor.Add inject the
ConferenceClientbeneath the@pagesdirective.
@page "/"@inject ConferenceClient ConferenceClient;
- Introduce a code directive at the bottom of the file.
@page "/"@inject ConferenceClient ConferenceClient;
<h1>Hello, world!</h1>
Welcome to your new app.
<SurveyPrompt Title="How is Blazor working for you?" />
@code {
}
- Now lets fetch the titles with our client.
@page "/"@inject ConferenceClient ConferenceClient;
<h1>Hello, world!</h1>
Welcome to your new app.
<SurveyPrompt Title="How is Blazor working for you?" />
@code {    private string[] titles = Array.Empty<string>();
    protected override async Task OnInitializedAsync()    {        var result = await ConferenceClient.GetSessions.ExecuteAsync();        titles = result.Data.Sessions.Nodes.Select(t => t.Title).ToArray();    }}
- Last, lets render the titles on our page as a list.
@page "/"@inject ConferenceClient ConferenceClient;
<h1>Hello, world!</h1>
Welcome to your new app.
<SurveyPrompt Title="How is Blazor working for you?" />
<ul>  @foreach (string title in titles) {    <li>@title</li>  }</ul>
@code {    private string[] titles = Array.Empty<string>();
    protected override async Task OnInitializedAsync()    {        var result = await ConferenceClient.GetSessions.ExecuteAsync();        titles = result.Data.Sessions.Nodes.Select(t => t.Title).ToArray();    }}
- Start the Blazor application with
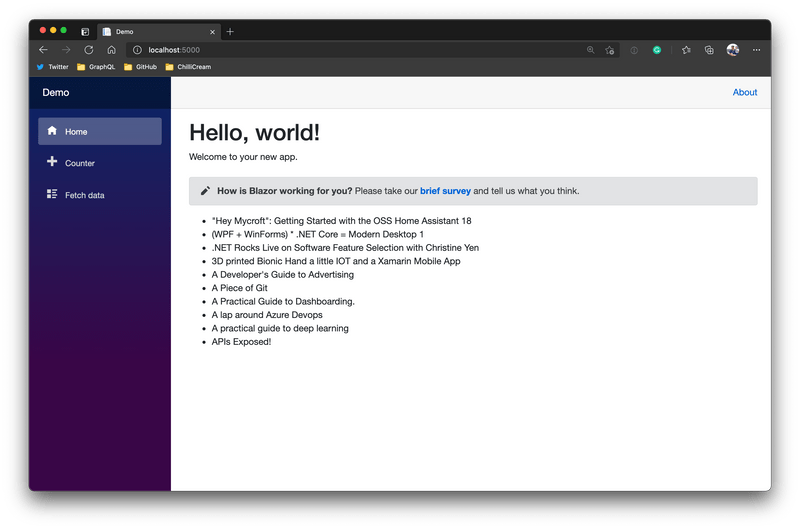
dotnet run --project ./Demoand see if your code works.
Step 6: Using the built-in store with reactive APIs.
The simple fetch of our data works. But every time we visit the index page it will fetch the data again although the data does not change often. Strawberry Shake also comes with state management where you can control the entity store and update it when you need to. In order to best interact with the store we will use System.Reactive from Microsoft. Lets get started :)
- Install the package
System.Reactive.
dotnet add Demo package System.Reactive
- Next, let us update the
_Imports.razorwith some more imports, namelySystem,System.Reactive.Linq,System.LinqandStrawberryShake.
@using System@using System.Reactive.Linq@using System.Linq@using System.Net.Http@using System.Net.Http.Json@using Microsoft.AspNetCore.Components.Forms@using Microsoft.AspNetCore.Components.Routing@using Microsoft.AspNetCore.Components.Web@using Microsoft.AspNetCore.Components.Web.Virtualization@using Microsoft.AspNetCore.Components.WebAssembly.Http@using Microsoft.JSInterop@using Demo@using Demo.Shared@using Demo.GraphQL@using StrawberryShake
- Head back to
Pages/Index.razorand replace the code section with the following code:
private string[] titles = Array.Empty<string>();private IDisposable storeSession;
protected override void OnInitialized(){    storeSession =        ConferenceClient            .GetSessions            .Watch(StrawberryShake.ExecutionStrategy.CacheFirst)            .Where(t => !t.Errors.Any())            .Select(t => t.Data.Sessions.Nodes.Select(t => t.Title).ToArray())            .Subscribe(result =>            {                titles = result;                StateHasChanged();            });}
Instead of fetching the data we watch the data for our request. Every time entities of our results are updated in the entity store our subscribe method will be triggered.
Also we specified on our watch method that we want to first look at the store and only if there is nothing in the store we want to fetch the data from the network.
Last, note that we are storing a disposable on our component state called storeSession. This represents our session with the store. We need to dispose the session when we no longer display our component.
- Implement
IDisposableand handle thestoreSessiondispose.
@page "/"@inject ConferenceClient ConferenceClient;@implements IDisposable
<h1>Hello, world!</h1>
Welcome to your new app.
<SurveyPrompt Title="How is Blazor working for you?" />
<ul>@foreach (var title in titles){    <li>@title</li>}</ul>
@code {    private string[] titles = Array.Empty<string>();    private IDisposable storeSession;
    protected override void OnInitialized()    {        storeSession =            ConferenceClient                .GetSessions                .Watch(StrawberryShake.ExecutionStrategy.CacheFirst)                .Where(t => !t.Errors.Any())                .Select(t => t.Data.Sessions.Nodes.Select(t => t.Title).ToArray())                .Subscribe(result =>                {                    titles = result;                    StateHasChanged();                });    }
    public void Dispose()    {        storeSession?.Dispose();    }}
Every time we move away from our index page Blazor will dispose our page which consequently will dispose our store session.
- Start the Blazor application with
dotnet run --project ./Demoand see if your code works.
The page will look unchanged.
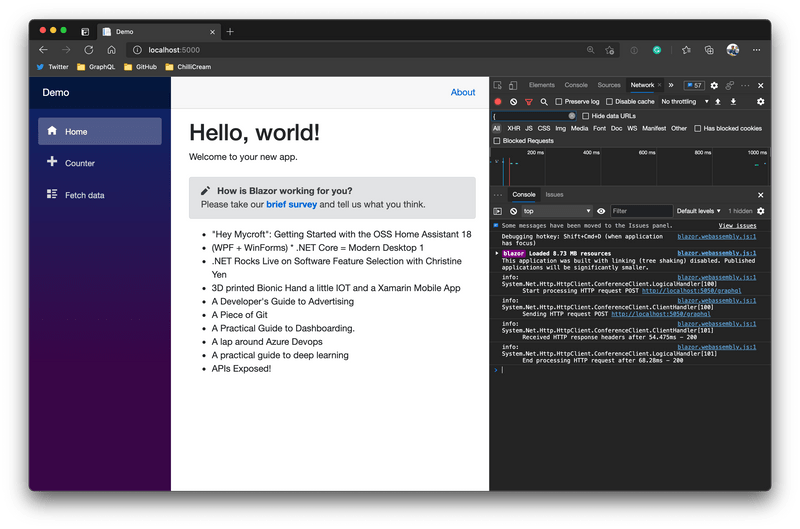
- Next, open the developer tools of your browser and switch to the developer tools console. Refresh the site so that we get a fresh output.
- Switch between the
Indexand theCounterpage (back and forth) and watch the console output.
The Blazor application just fetched a single time from the network and now only gets the data from the store.
Step 7: Using GraphQL mutations
In this step we will introduce a mutation that will allow us to rename a session. For this we need to change our Blazor page a bit.
- We need to get the session id for our session so that we can call the
renameSessionmutation. For this we will rewrite ourGetSessionsoperation.
query GetSessions {  sessions(order: { title: ASC }) {    nodes {      ...SessionInfo    }  }}
fragment SessionInfo on Session {  id  title}
- Next we need to restructure the
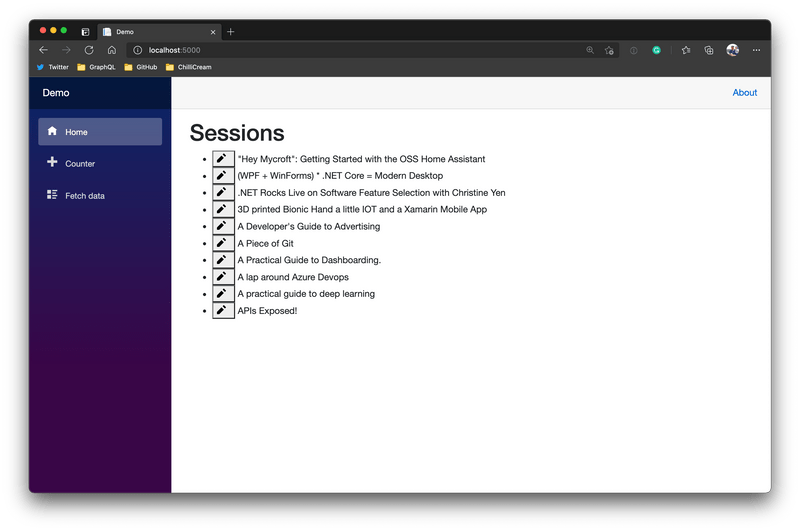
Index.razorpage. We will get rid of the Blazor default content and rework our list to use our fragmentSessionInfo. Further, we will introduce a button to our list so that we have a hook to start editing items from our list.
@page "/"@inject ConferenceClient ConferenceClient;@implements IDisposable
<h1>Sessions</h1>
<ul>@foreach (ISessionInfo session in sessions){    <li><button @onclick="() => OnClickSession(session)"><span class="oi oi-pencil mr-2" aria-hidden="true"></span></button> @session.Title</li>}</ul>
@code {    private IReadOnlyList<ISessionInfo> sessions = Array.Empty<ISessionInfo>();    private IDisposable storeSession;
    protected override void OnInitialized()    {        storeSession =            ConferenceClient                .GetSessions                .Watch(ExecutionStrategy.CacheFirst)                .Where(t => !t.Errors.Any())                .Select(t => t.Data!.Sessions!.Nodes)                .Subscribe(result =>                {                    sessions = result;                    StateHasChanged();                });    }
    private void OnClickSession(ISessionInfo session)    {
    }
    public void Dispose()    {        storeSession?.Dispose();    }}
- Next, we will define the GraphQL mutation by adding a new GraphQL document
RenameSession.graphql.
mutation RenameSession($sessionId: ID!, $title: String!) { renameSession(input: { sessionId: $sessionId, title: $title }) { session { ...SessionInfo } }}
Rebuild, the project so that the source generator will create all our new types.
Go back to the
Index.razorpage and lets add some state for our edit controls.
private ISessionInfo selectedSession;private string title;
The page should now look like the following:
@page "/"@inject ConferenceClient ConferenceClient;@implements IDisposable
<h1>Sessions</h1>
<ul>@foreach (ISessionInfo session in sessions){    <li><button @onclick="() => OnClickSession(session)"><span class="oi oi-pencil mr-2" aria-hidden="true"></span></button> @session.Title</li>}</ul>
@code {    private IReadOnlyList<ISessionInfo> sessions = Array.Empty<ISessionInfo>();    private IDisposable storeSession;    private ISessionInfo selectedSession;    private string title;
    protected override void OnInitialized()    {        storeSession =            ConferenceClient                .GetSessions                .Watch(ExecutionStrategy.CacheFirst)                .Where(t => !t.Errors.Any())                .Select(t => t.Data!.Sessions!.Nodes)                .Subscribe(result =>                {                    sessions = result;                    StateHasChanged();                });    }
    private void OnClickSession(ISessionInfo session)    {
    }
    public void Dispose()    {        storeSession?.Dispose();    }}
- Now, lets put some controls in to let the user edit the title of one of our sessions.
@if (selectedSession is not null){ <br /> <p>Edit Session Title:</p> <input @bind-value="@title" /> <button @onclick="OnSaveTitle">Save</button>}
The page should now look like the following:
@page "/"@inject ConferenceClient ConferenceClient;@implements IDisposable
<h1>Sessions</h1>
<ul>@foreach (ISessionInfo session in sessions){    <li><button @onclick="() => OnClickSession(session)"><span class="oi oi-pencil mr-2" aria-hidden="true"></span></button> @session.Title</li>}</ul>
@if (selectedSession is not null){    <br />    <p>Edit Session Title:</p>    <input @bind-value="@title" />    <button @onclick="OnSaveTitle">Save</button>}
@code {    private IReadOnlyList<ISessionInfo> sessions = Array.Empty<ISessionInfo>();    private IDisposable storeSession;    private ISessionInfo selectedSession;    private string title;
    protected override void OnInitialized()    {        storeSession =            ConferenceClient                .GetSessions                .Watch(ExecutionStrategy.CacheFirst)                .Where(t => !t.Errors.Any())                .Select(t => t.Data!.Sessions!.Nodes)                .Subscribe(result =>                {                    sessions = result;                    StateHasChanged();                });    }
    private void OnClickSession(ISessionInfo session)    {
    }
    public void Dispose()    {        storeSession?.Dispose();    }}
- Next, we want to wire the controls up with the click. For that replace the
OnClickSessionmethod with the following code:
private void OnClickSession(ISessionInfo session){ selectedSession = session; title = session.Title; StateHasChanged();}
- Add, a new method that now executes our new mutation
RenameSession.
private async Task OnSaveTitle(){ await ConferenceClient.RenameSession.ExecuteAsync(selectedSession.Id, title); selectedSession = null; title = null; StateHasChanged();}
The page should now look like the following:
@page "/"@inject ConferenceClient ConferenceClient;@implements IDisposable
<h1>Sessions</h1>
<ul>@foreach (ISessionInfo session in sessions){    <li><button @onclick="() => OnClickSession(session)"><span class="oi oi-pencil mr-2" aria-hidden="true"></span></button> @session.Title</li>}</ul>
@if (selectedSession is not null){    <br />    <p>Edit Session Title:</p>    <input @bind-value="@title" />    <button @onclick="OnSaveTitle">Save</button>}
@code {    private IReadOnlyList<ISessionInfo> sessions = Array.Empty<ISessionInfo>();    private IDisposable storeSession;    private ISessionInfo selectedSession;    private string title;
    protected override void OnInitialized()    {        storeSession =            ConferenceClient                .GetSessions                .Watch(ExecutionStrategy.CacheFirst)                .Where(t => !t.Errors.Any())                .Select(t => t.Data!.Sessions!.Nodes)                .Subscribe(result =>                {                    sessions = result;                    StateHasChanged();                });    }
    private void OnClickSession(ISessionInfo session)    {        selectedSession = session;        title = session.Title;        StateHasChanged();    }
    private async Task OnSaveTitle()    {        await ConferenceClient.RenameSession.ExecuteAsync(selectedSession.Id, title);        selectedSession = null;        title = null;        StateHasChanged();    }
    public void Dispose()    {        storeSession?.Dispose();    }}
- Start the Blazor application with
dotnet run --project ./Demoand see if your code works.
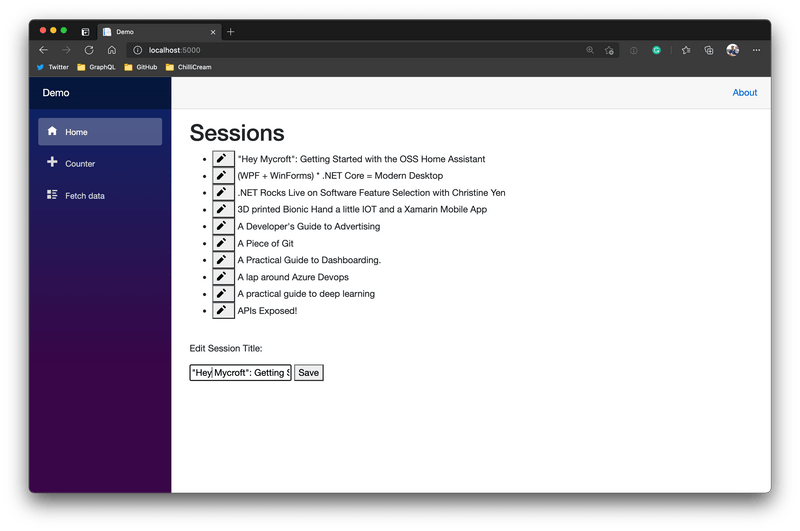
- Click on the edit button of one of the sessions.
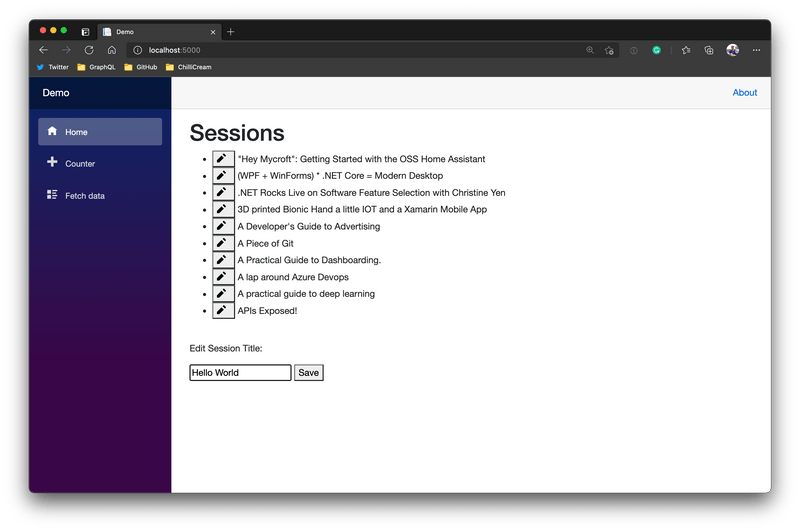
- Change the title of the session and click save.
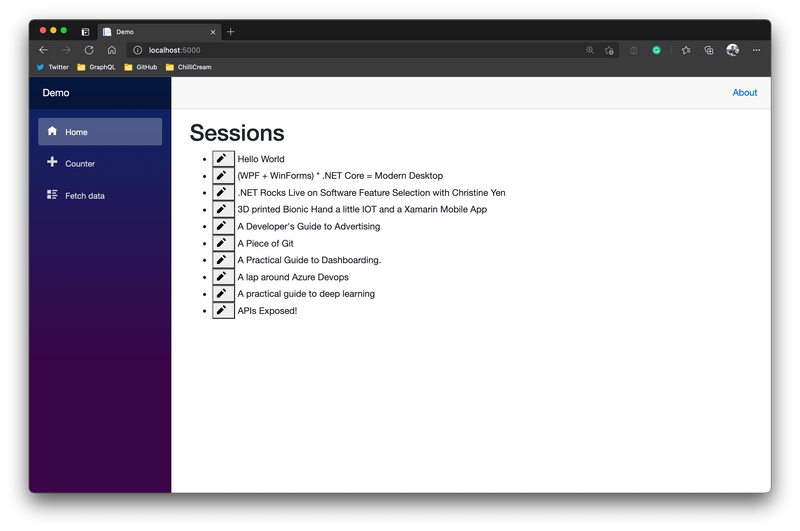
- The item is now changed in the list although we have not explicitly written any code to update the item in our list component.
Strawberry Shake knows about your entities and how they are connected. Whenever one request updates the state, all components referring to data of the linked entities are updated.
